

Bored of the old scrambled eggs, pancakes, toast and coffee? Well, me neither, but, how about trying something different?
I came across a recipe online for these very cute, gourmet looking "breakfast toast cups"that included bacon, toast, cheese and eggs. I thought they probably would require a lot of work and skills, but after more carefully reading the recipe, I realized it wasn't hard at all! So one Saturday morning I decided to give it try...and they turned out perfect! Not only that, hubby LOVED it!
And then it hit me, why don't more people know about this? It's so easy and yet such a fun, creative breakfast, especially if you are having guests over. Well my dear readers, I decided I would share the love with you, but not only that, I will share the "skinny" breakfast cup version! HOWEVER, if you are not interested in watching your weight, just use real bacon and white bread and you will be fine :)
So here you go:
Breakfast Cups (Skinny Version)

Ingredients (per cup):
- 1 tsp Butter
- 1 slice of Whole Grain Bread
- 1 or 2 slices Turkey Bacon
- 1 Egg
- Salt
- Pepper
- Parsley (optional)
- 1 Tbp of Reduced fat Cheddar Shredded cheese
1 - Pre-heat oven to 400 degrees
2 - Cut edges of bread slices only leaving the soft part
3 - Lightly butter ramekins and press bread onto the bottom and sides, forming a cup ( the original recipe actually cut a circle on the bread slice by using a cookie cutter, but I didn't think that was necessary unless you really want a perfect cup ). Add shredded cheese to the bottom.
4 - Cook bacon slices half way on a skillet until they are golden, but still pliable (about 3 - 5 minutes). Shape bacons in a circle inside ramekins edges.
5 - Place cups in the oven for 5 minutes so that the bacon can cook a bit more (see step 7 if you don't like your bacon very crispy)
6 - After 5 minutes, remove them from the oven and crack the eggs inside the cups. Then add salt, pepper to taste and garnish with parsley.
7 - Places ramekins back in the oven for 10 -15 minutes depending how soft you want the yolk to be. I left mine for 15 minutes since I don't like my yolk very runny. Also, I like the bacon on the crispier side, but if you like your bacon not so crisp, but your yolk harder, you will need to cook your bacon for less time (step 5).
8 - Remove ramekins from oven and let it cool for 3 minutes, then use a fork or knife and remove the cups from ramekins and place them on a plate. They will slide right out!
And that's it! In less than 30 minutes you will have made a breakfast that looks like it came straight from a fancy french restaurant. So easy!
Now, if you are a visual person, I took some pictures while making them for you guys.
Step-by-Step with Pictures:
Step-by-Step with Pictures:
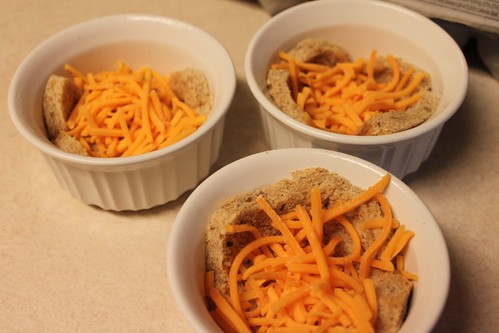
Steps 1 - 3 : Pre-heat oven to 400 degrees. Lightly butter ramekins and press bread onto the ramekins sides and bottom. Add shredded cheese.
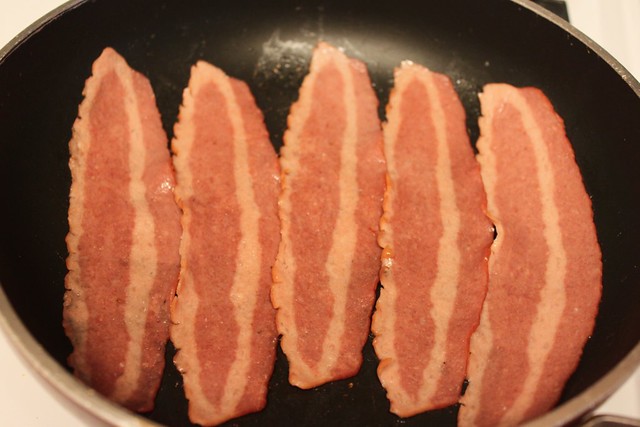
Steps 3 - 5 : Cook bacon until golden (about 3 - 5 minutes ) and shape them around the cup inside the ramekin. Place them in the oven for 5 minutes.


Steps 5 - 6: Remove ramekins from the oven and crack eggs inside the cups. Add salt and pepper to taste and garnish with parsley. Place them back in the oven for another 10 -15 minutes.


Steps 7 - 8: Remove ramekins from the oven and let it cool for a couple of minutes. Then carefully remove cups from ramekins using a fork or spoon. They should slide right out.

Place the cups on a place and serve!

I hope you like it. I certainly loved eating the results of this week's tutorial ;)
xoxo
