Tuesday, December 20, 2011

Photography as Color Inspiration


If you love photography as well as design, you should know this: You can get most of your design inspiration from your photographs. Our eye is naturally drawn to harmonious color combinations but we don't realize it. When we take or see breathtaking pictures we tend to think of it as having the objects, people or nature set up in the perfect way, but we seldom pay attention to the actual color harmony present in the photograph. This is a great way of coming up with color combinations ideas for weddings,  wed design, interior design, or anything you are thinking about creating. 

I decided to look at some of the photos I've taken in the past and make a swatch using the colors in the photographs using the eyedropper in Photoshop. I also added the context in which these colors would be perfect. 

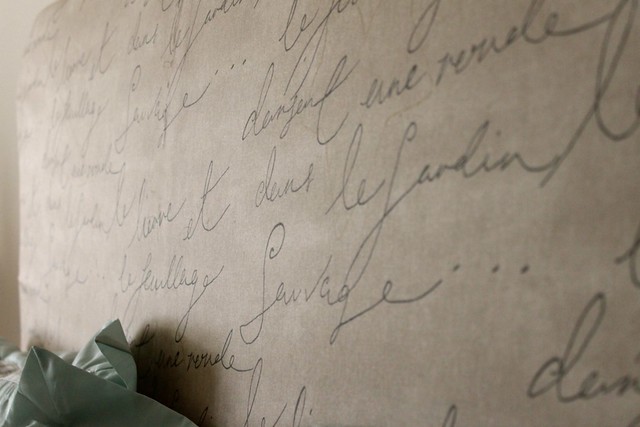
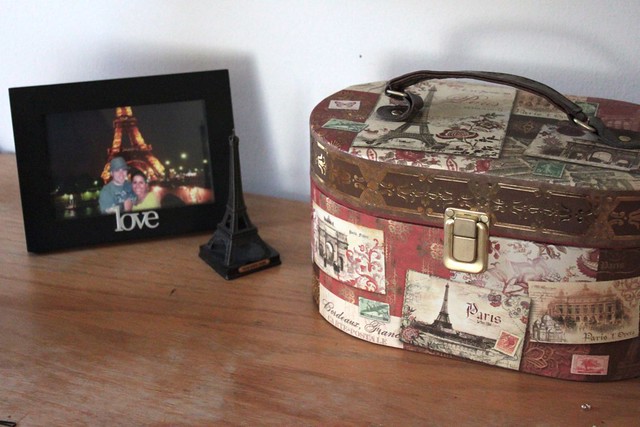
Living room or Bedroom Inspiration:


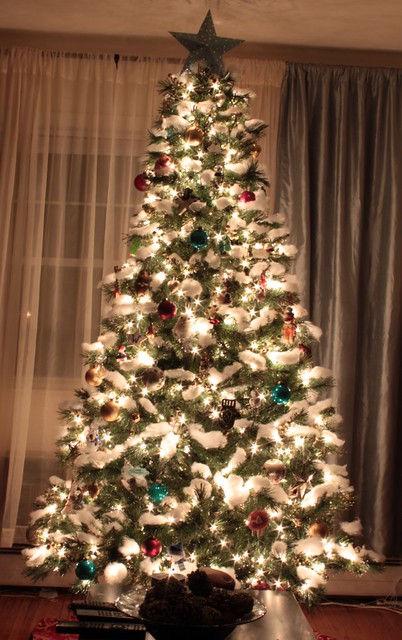
SPA or Relaxation Room Inspiration: 


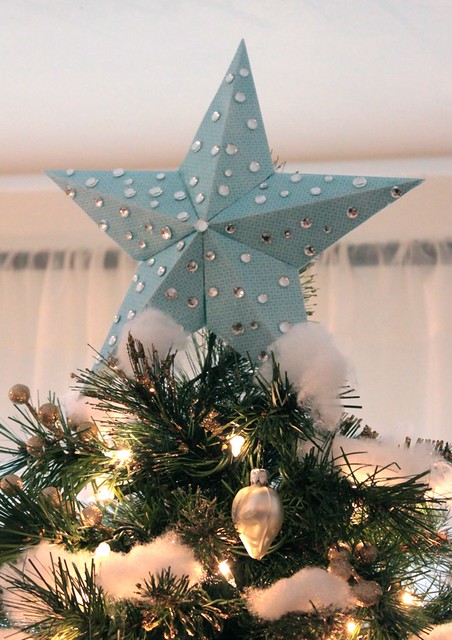
Girl's Room or Birthday Card Inspiration:


Bathroom Inspiration: 


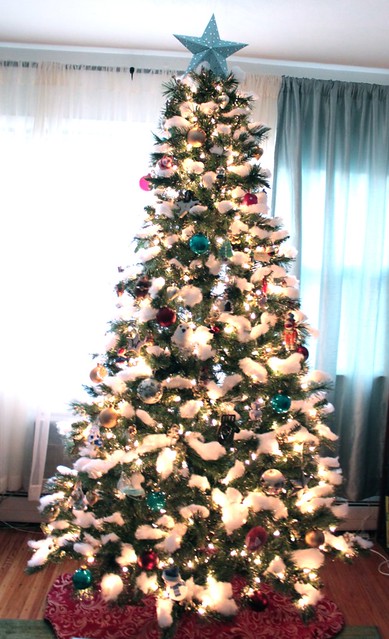
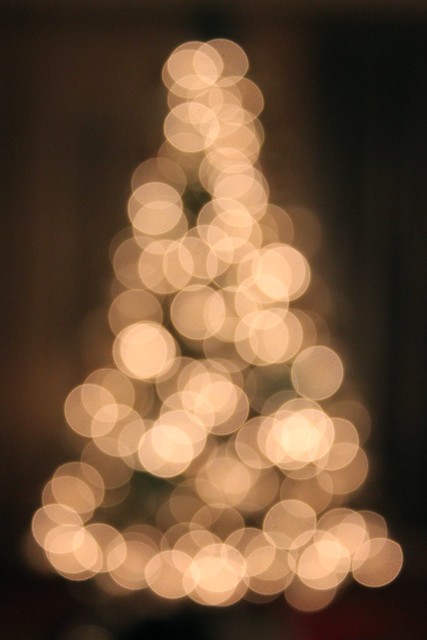
Master Bedroom or Living Room Inspiration:


You can do the same using your own photographs or other photographs online. And maybe even search for photos related to the feeling you are trying to achieve. For instance, if you want colors for a fall wedding, try looking for autumn photos; if you are looking for colors for your bedroom and you want it to be relaxing, how about looking for pictures of waterfalls or clouds? You get the idea :)

xoxo


Friday, December 16, 2011

Grow Your Own Wheatgrass Centerpieces

There's nothing like adding a pop of color to your home during these gray and cold days of winter. And what better than bringing spring into your home with an arrangement of Wheatgrass?

A lot of people grow wheatgrass for juicing because they believe it detoxifies the body and is good for you. It probably is, but that is not the reason I grew mine. I grew mine because I wanted a pretty centerpiece for my dining room table. I wish I had tried this before my wedding, because it is so cheap and easy!

This is a picture of the wheatgrass I planted 7 days ago. Yep, only SEVEN days ago! Not to mention I have trimmed some of the top to make them look a bit more even. Isn't this crazy??


I got the vase for a little over $3 at Michaels as they were 60% off. I got two of them. 

I got the potting soil at Home Depot for about $3.50. I used Scotts Premium Potting Soil. 


And finally the Wheatgrass seeds. They say you can find them at any Health store, but I've never seen them at our local one, so I bought them at Amazon, here

Once I had my potting soil, my vases and my seeds, I pretty much just added the potting soil to the vase (about 4 inches) and spread the seeds on top. I actually didn't spread as many seeds as they say you should online because I hadn't read any instructions online at that time, but as you can see it didn't turn out too bad. I then covered them with a thin layer of potting soil and watered them everyday keeping the soil moist. 

But for instructions sake, I decided to start another pot and take pictures to show you guys. 

Step 1: 

Fill your vase with about 3 - 4 inches of Potting Soil 


Step 2: 

Add one layer of Wheatgrass seeds being careful not to layer them on top of each other too much. 


Step 3: 

Add another thin layer of potting soil on top of your seeds and water them until the soil is moist but not damp. 

Step 4: 

Keep the vase in a dark place and water the soil at least twice a day to ensure the soil is moist at all times. 

In about 48 hours your seeds will start to sprout and look like this: 


Once they are about 1 - 2 inches high, you can remove them from the dark and keep them in indirect sunlight. 

**Updated** In ONLY 4 days, they looked like this: 


So yep, in less than 7 days you should have them high enough for centerpieces.

Here are some arrangements I've put together with my vases that are fully grown.. I don't know why but I really liked the look with the pop of orange from the clementines. 


And that is it my dears! Very easy to grow and cheap to make! 


xoxo


Friday, December 9, 2011

DIY Headboard "Pour Une Chambre Française"!

I've wanted a headboard for a very long time, but hadn't been able to shell out $300 or more on a brand new one. So I decided to make one myself :)


First came the inspiration. I had seen a headboard I really liked at Pier 1 that had a french theme. That was perfect because our bedroom has a Paris theme going on that I want to keep. So that inspired me and helped me narrow down my fabric choices. So on Black Friday, I went to Joann.com and browsed through the fabrics online until I found this one with the french writing. I loved it and it was only $10.80 per yard! So I bought 4 yards.


Once I had the fabric, I went to Home Depot and bought the "bone" of the headboard. I got a custom cut 5 X3 plywood board for only $14.99. And I got to keep the scraps which turned out to be helpful (you will see why in a bit).


The hardest part was bringing it upstairs since DH wasn't home and I'm very inpatient when I want to get something done. 

I also got foam from Joann that came to $15 per yard with a 50% off coupon. I only bought 2 yards because I already had some foam at home. I then layered the foam on top of the board and hot glue the back to the board just to ensure it stayed in place when I covered it with the fabric.


I then upholstered the headboard using a staple gun. The fabric was also not wide enough to cover the whole board and I couldn't turn it around because of the pattern. So I hot glued (I know I probably should have stitched them but I was trying to get this done quickly) the two pieces of fabric together right in the middle, being careful to match the pattern on both sides. 

And after some pulling, adjusting and stapling, I got a headboard!


I achieved the curvy shape on top by leaving some extra foam over the board and then pulling the fabric tighter over the areas I wanted to curve. And as you see below, I nailed two pieces of plywood to each side to serve as the base. These are the scraps I was talking about earlier :)

And then I just put the bed in front of it to secure it and that's it.


Since I had a lot of fabric leftover, I decided to re-upholster the bench at the end of our bed as well, and make it a matching set: 


And Voila!


And here are some other french inspired pieces of my bedroom :)

Collection of Paris inspired pictures around the mirror.


Parisian pictures above the bed. The middle one is a collage of pictures we took in Paris on our honeymoon.


Jewelry box, our picture in front of the Eiffel Tower and a little Eiffel Tower we brought from Paris :)


And that's it! Next step in making over our bedroom: Painting the dressers! I think that probably will be a Spring project :)

Au Revoir!


Friday, December 2, 2011

IT'S BEGINNING TO LOOK A LOT LIKE CHRISTMAS

Have you found your Christmas spirit yet? Well, I hope so because this post is all about it!

This year we got a new Christmas tree (which I love!) from Martha Stewart. I know, I know, it's not a real tree but like I said last year, it doesn't really make a difference for me since I did not grow up with real Christmas trees in Brazil anyway. So this is pretty darn good for me. I do want to have a real Christmas tree eventually, but maybe when we get a house with a bigger space... 

So this is our living room with our new Christmas tree (I hate these couches by the way, but we will get new ones this coming year, hopefully!).


And this is our living room after it snowed in!!


Yep, I used fake snow on our tree this year again! And the best thing is, I didn't have to buy a new bag. I  saved all the fake snow I used last year in plastic bags and re-used again. I love this look! I don't know why more people don't do it. The fake snow is super cheap ( I bought mine at Target) and it's very easy to do!


And THIS is my Star Tree Topper that I made this afternoon :) I didn't use the last one I made for my tutorial, because I didn't like the way the gold spray paint looked on it, so I made a new one and added some bling on it. If you want to know how to make it, you can see the full instructions in my tutorial here


And this is the picture I took using the tips from Augusttea Photography. I love the way it makes the lights sparkle. I used my tripod and took it with a slow shutter speed of 15 seconds. 


She also give this tip on how to take this awesome picture of your tree out of focus. Looks awesome doesn't it?


If you are still looking for more Christmas ideas to awaken your Christmas spirit, you can also check out my board "Holiday Ideas" on Pinterest. It's full of cute ideas I find in there, specially if you are into crafts and DIY. 

Only 22 days til Christmas!!

xoxo